 www.greenlife.co.ke
 Introduction: Building Your Own Aquaponics System This guide will walk you through the process of building a small, DIY aquaponics system. This system will combine aquaculture (raising fish) and hydroponics (growing plants without soil) to create a symbiotic environment where fish waste provides nutrients for plant growth, and the plants, in turn, filter the water for the fish. This project is a great way to learn about sustainable food production and create a beautiful, productive addition to your home or garden.
Materials List: A container for the fish tank (approximately 20-50 gallons). A plastic tote or a repurposed aquarium works well. A container for the grow bed (needs to be food-grade). Choose a size that complements your fish tank. A submersible water pump (rated for the size of your system). Tubing to connect the pump to the grow bed and the grow bed back to the fish tank. Grow media (clay pebbles, lava rock, or gravel). Bell siphon components (if building a flood and drain system – alternative systems like Deep Water Culture don't need these). This might include a bell housing, standpipe, and media guard. Siphon kits can be purchased online or made from PVC pipe. Plumbing fittings as needed (bulkhead fittings, elbows, connectors). Fish (goldfish, tilapia, or other suitable species). Research the specific needs of your chosen fish. Plants (leafy greens, herbs, and some vegetables are good choices). Water test kit (for ammonia, nitrite, nitrate, and pH). Optional: Air pump and air stone (to oxygenate the water). Optional: Heaters if required to keep water temperature constant to fish needs.
Step 1: Preparing the Fish Tank Choose a suitable location for your aquaponics system, considering sunlight, accessibility, and weight capacity. Thoroughly clean the fish tank with water (no soap!). Install any necessary plumbing fittings for drainage or connecting the pump. Fill the tank with dechlorinated water. Let it cycle for a few weeks.
Step 2: Constructing the Grow Bed Ensure the grow bed is clean and leak-proof. If using a flood and drain system, install the bell siphon components at the bottom of the grow bed, making sure the standpipe is tall enough to allow for sufficient water depth in the grow bed before the siphon activates. Connect the outlet of the grow bed to a return pipe that will drain back into the fish tank.
Step 3: Setting Up the Plumbing Place the submersible water pump in the fish tank. Connect the tubing from the pump outlet to the inlet of the grow bed. Securely attach the return pipe from the grow bed back to the fish tank. Ensure all connections are tight to prevent leaks. If desired, add air stone and air pump to add additional oxygen to water, place the air stone in fish tank.
Step 4: Adding the Grow Media Rinse the grow media thoroughly to remove any dust or debris. Fill the grow bed with the rinsed grow media. Distribute it evenly around the bell siphon (if using).
Step 5: Cycling the System Turn on the water pump and observe the water flow and drainage. Check for leaks and make any necessary adjustments. Allow the system to cycle for several weeks to establish a beneficial bacteria colony. This bacteria converts fish waste (ammonia) into less harmful nitrates that plants can use. Monitor water parameters regularly using a water test kit. Add ammonia source to start the Nitrogen Cycle. Add small amounts of ammonia until both ammonia and nitrite are measuring zero.
Step 6: Introducing Fish and Plants Once the system is properly cycled and water parameters are stable, gradually introduce a small number of fish to the tank. After a week or so, if the fish are healthy, you can add more. Start with young plants or seedlings in the grow bed. Gently place them into the grow media, ensuring the roots are covered.
Step 7: Maintaining the System Regularly monitor water parameters (ammonia, nitrite, nitrate, pH) and adjust as needed. Add water to compensate for evaporation. Remove any dead leaves or plant debris. Provide adequate sunlight or supplemental lighting for the plants. Feed the fish a high-quality fish food. Clean the fish tank and grow bed periodically to remove any build-up of algae or debris. Only add water to replace evaporated water, only perform water changes if your water parameters are bad.
Conclusion: Enjoy Your Aquaponics System Congratulations on building your own aquaponics system! With proper care and maintenance, your system will provide you with fresh fish and vegetables, while also being an engaging and educational hobby. Remember to research the specific needs of your chosen fish and plants to ensure their health and productivity. Experiment with different types of plants and fish to find what works best for your system and climate.
What Are Aquaponics?
www.greenlife.co.ke Aquaponics System: Everything You Ever Wanted To Know
 agrierp.com
 Vertical Vegetable Aquaponics
 www.plantsonwalls.com
 /GettyImages-1194451296-46ea81725e834c9bbffea37679624336.jpg) www.treehugger.com
www.treehugger.com  www.freshwatersystems.com
  www.freshwatersystems.com
  www.irishmirror.ie ```html
  www.lifeandstylemag.com
  www.hellomagazine.com
 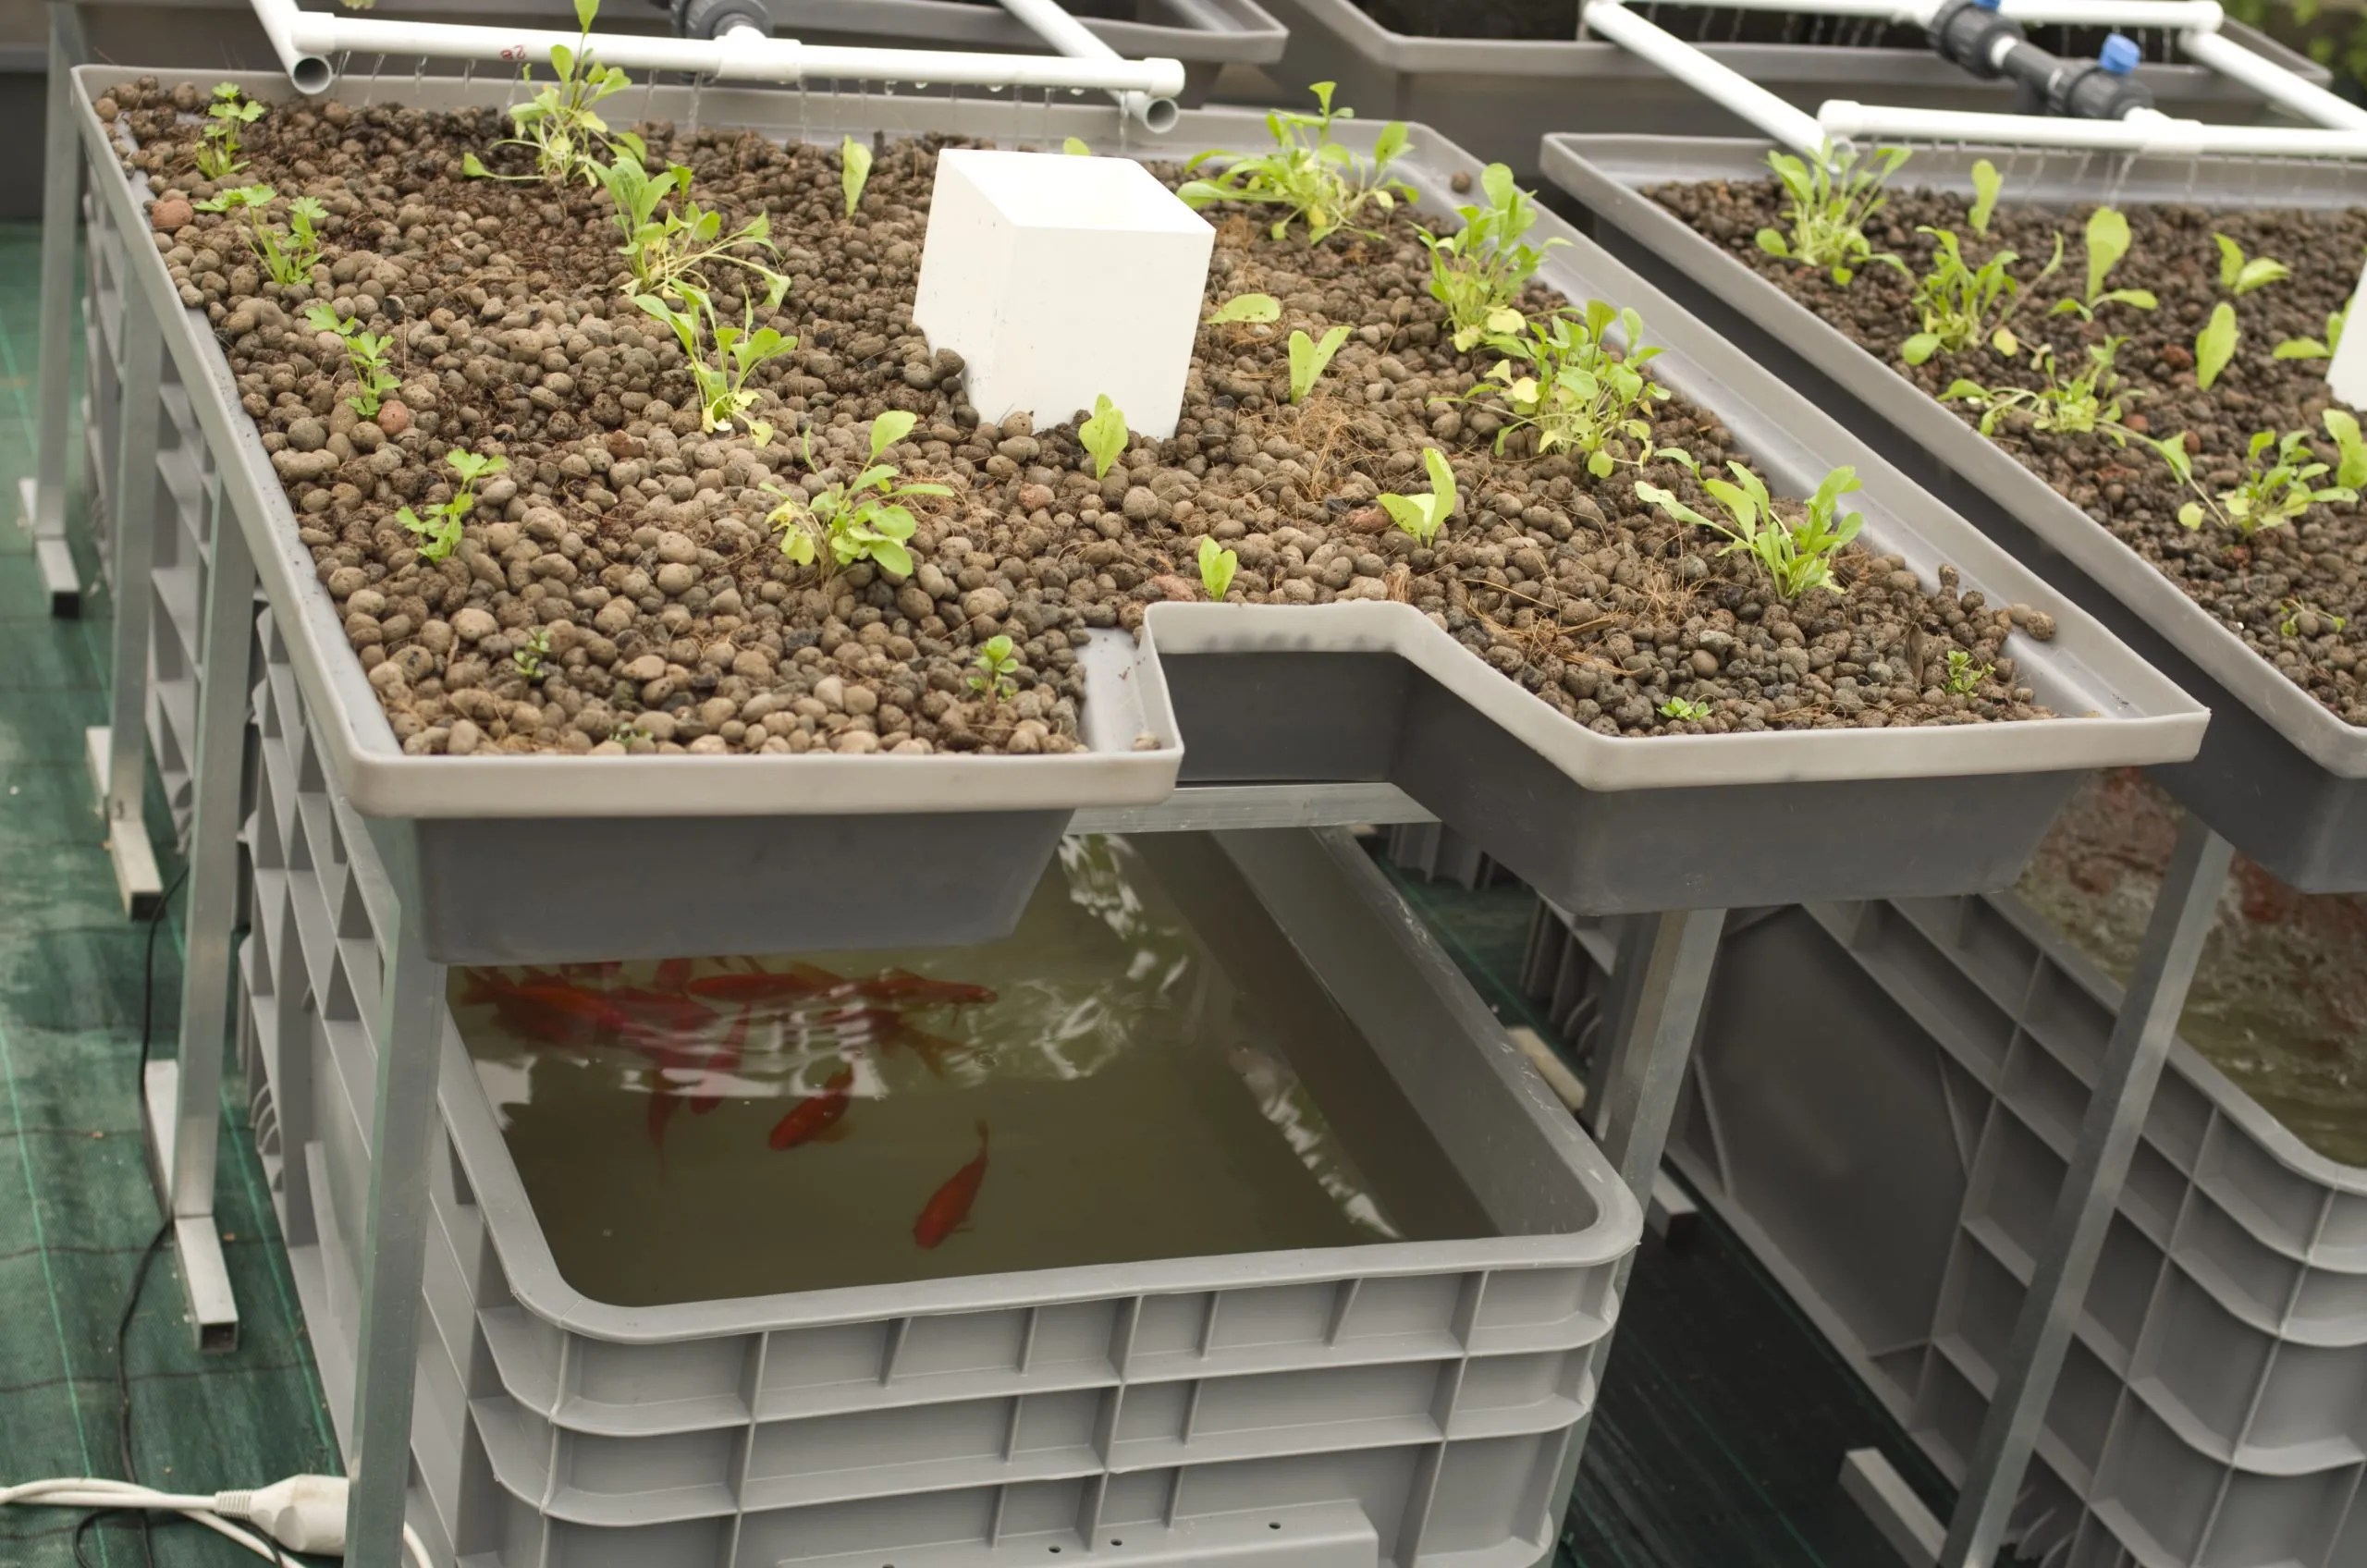 www.aquaponicsforbeginners.com
  storage.googleapis.com
  climatebiz.com
  climatebiz.com
  systemaqua.blogspot.com
  www.pinterest.com.au
  www.pinterest.com
  www.pinterest.com