
 www.aquaponicsforbeginners.com
 Opening
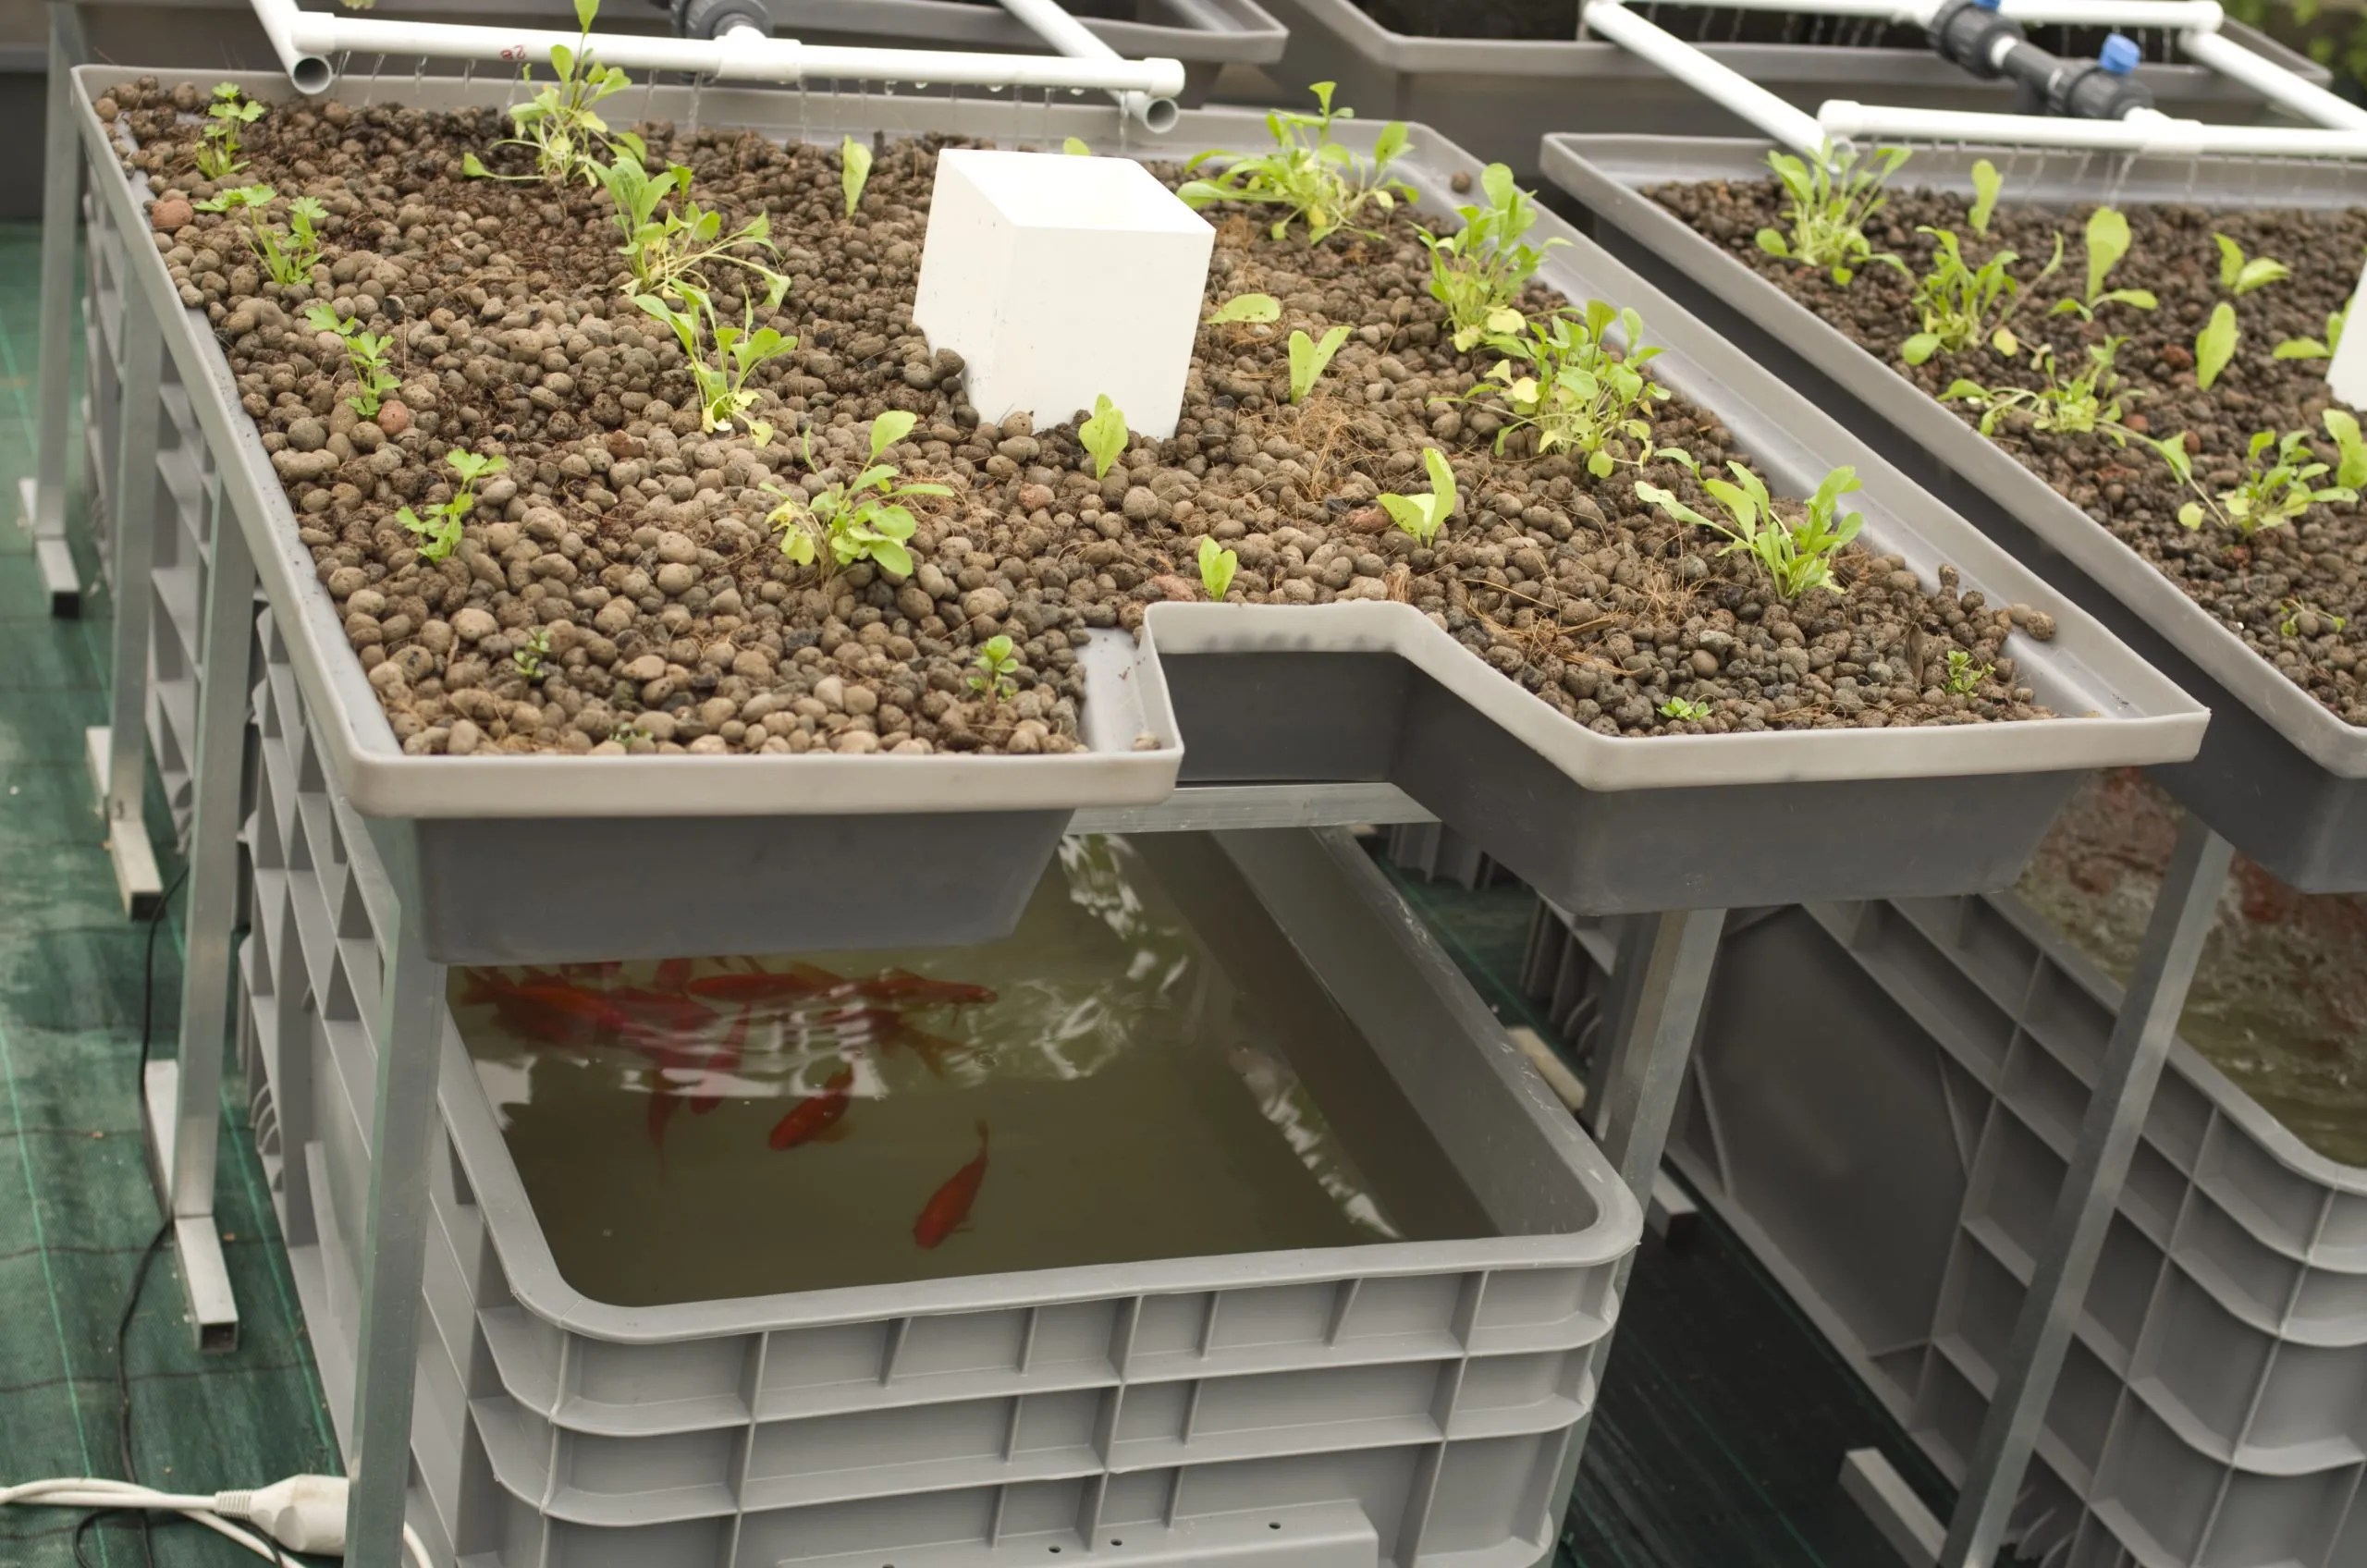
Ready to dive into the fascinating world of aquaponics? Building your own aquaponics box is a rewarding project that combines gardening and fishkeeping. This step-by-step guide will walk you through the process of creating a simple yet effective aquaponics system that you can enjoy in your own backyard or even indoors. Get ready to grow delicious vegetables and raise healthy fish simultaneously!
Ready to dive into the fascinating world of aquaponics? Building your own aquaponics box is a rewarding project that combines gardening and fishkeeping. This step-by-step guide will walk you through the process of creating a simple yet effective aquaponics system that you can enjoy in your own backyard or even indoors. Get ready to grow delicious vegetables and raise healthy fish simultaneously!
Materials You'll Need
Before we get started, gather the following materials:  storage.googleapis.com
  www.greenlife.co.ke www.aquaponicsforbeginners.com

Before we get started, gather the following materials:
- A large plastic container (e.g., a tote or stock tank) for the fish tank (approximately 75-100 gallons)
- A smaller plastic container (e.g., a storage bin) for the grow bed (approximately 25-50 gallons)
- A submersible water pump (rated for the appropriate tank size)
- Flexible tubing to connect the pump to the grow bed
- Grow media (e.g., clay pebbles, lava rock)
- A siphon or bell siphon kit (optional, for automated draining of the grow bed)
- Fish (e.g., tilapia, goldfish research what's suitable for your climate and tank size)
- Vegetable seedlings or seeds
- pH testing kit
- Water conditioner (to remove chlorine and chloramine from tap water)
- Optional: Air pump and air stone for additional aeration
- Drill with various sized drill bits
- Measuring tape or ruler
- PVC pipe and fittings (for creating a stand if needed)
Step 1: Prepare the Fish Tank
First, thoroughly clean the large plastic container that will serve as your fish tank. Use soap and water, rinsing it extremely well to ensure no residue remains. Consider the location of your aquaponics box, ensuring it receives adequate sunlight (but not excessive direct sunlight, which can overheat the water) and is easily accessible for maintenance. If you're using tap water, treat it with a water conditioner to remove chlorine and chloramine, which are harmful to fish. Let the water sit for at least 24 hours before introducing any fish. Consider adding an air pump and air stone for extra oxygenation, which is especially important in warmer climates or with higher fish densities.
First, thoroughly clean the large plastic container that will serve as your fish tank. Use soap and water, rinsing it extremely well to ensure no residue remains. Consider the location of your aquaponics box, ensuring it receives adequate sunlight (but not excessive direct sunlight, which can overheat the water) and is easily accessible for maintenance. If you're using tap water, treat it with a water conditioner to remove chlorine and chloramine, which are harmful to fish. Let the water sit for at least 24 hours before introducing any fish. Consider adding an air pump and air stone for extra oxygenation, which is especially important in warmer climates or with higher fish densities.
Step 2: Prepare the Grow Bed
Next, prepare the smaller plastic container for the grow bed. This container will sit above the fish tank, allowing water to be pumped up and drain back down. If your grow bed doesn't already have drainage holes, drill several holes (approximately 1/2 inch in diameter) in the bottom of the grow bed. These holes will allow water to drain back into the fish tank. Rinse the grow media (clay pebbles, lava rock, etc.) thoroughly to remove any dust or debris. This step is crucial to prevent clouding the water in your fish tank. Fill the grow bed with the rinsed grow media, leaving a few inches of space at the top for planting.
Next, prepare the smaller plastic container for the grow bed. This container will sit above the fish tank, allowing water to be pumped up and drain back down. If your grow bed doesn't already have drainage holes, drill several holes (approximately 1/2 inch in diameter) in the bottom of the grow bed. These holes will allow water to drain back into the fish tank. Rinse the grow media (clay pebbles, lava rock, etc.) thoroughly to remove any dust or debris. This step is crucial to prevent clouding the water in your fish tank. Fill the grow bed with the rinsed grow media, leaving a few inches of space at the top for planting.
Step 3: Set Up the Plumbing
Now, it's time to connect the fish tank and grow bed. Place the grow bed above the fish tank. This may require building a simple stand using PVC pipe and fittings, or finding a sturdy table or shelf to support the weight of the grow bed when it's filled with water and media. Place the submersible water pump inside the fish tank. Connect one end of the flexible tubing to the water pump's outlet. Run the other end of the tubing to the grow bed. Secure the tubing in place so it directs water evenly across the grow bed. If you are using a simple flood and drain system (without a siphon), position the tubing outlet slightly above the grow media surface.
Now, it's time to connect the fish tank and grow bed. Place the grow bed above the fish tank. This may require building a simple stand using PVC pipe and fittings, or finding a sturdy table or shelf to support the weight of the grow bed when it's filled with water and media. Place the submersible water pump inside the fish tank. Connect one end of the flexible tubing to the water pump's outlet. Run the other end of the tubing to the grow bed. Secure the tubing in place so it directs water evenly across the grow bed. If you are using a simple flood and drain system (without a siphon), position the tubing outlet slightly above the grow media surface.
Step 4: Implement a Drainage System (Siphon or Drain Holes)
This step determines how the water drains from the grow bed back into the fish tank.
This step determines how the water drains from the grow bed back into the fish tank.
- Option 1: Bell Siphon
Install a bell siphon kit according to the manufacturer's instructions. A bell siphon automatically drains the grow bed when the water reaches a certain level, creating a flood and drain cycle that is beneficial for plant growth. - Option 2: Drain Holes (Simplified)
If you opted for drain holes only in Step 2, then no further action is needed for drainage. Excess water will simply drain back down once the grow bed is fully saturated, creating a continuous flow system. Be mindful of the flow rate; the pump should not output more water than the drain holes can handle.
Step 5: Cycle the System
Before adding fish and plants, it's essential to cycle the system to establish beneficial bacteria. These bacteria convert fish waste into nutrients that plants can use. Fill the fish tank and grow bed with water. Turn on the water pump and allow the system to run for several weeks. Add a small amount of ammonia (available at pet stores) to the fish tank to start the nitrogen cycle. Monitor the water parameters (ammonia, nitrite, nitrate) using a pH testing kit. The cycle is complete when ammonia and nitrite levels consistently read zero, and nitrate levels are present. This typically takes 2-6 weeks.
Before adding fish and plants, it's essential to cycle the system to establish beneficial bacteria. These bacteria convert fish waste into nutrients that plants can use. Fill the fish tank and grow bed with water. Turn on the water pump and allow the system to run for several weeks. Add a small amount of ammonia (available at pet stores) to the fish tank to start the nitrogen cycle. Monitor the water parameters (ammonia, nitrite, nitrate) using a pH testing kit. The cycle is complete when ammonia and nitrite levels consistently read zero, and nitrate levels are present. This typically takes 2-6 weeks.
Step 6: Introduce Fish
Once the system is cycled, it's time to introduce your fish. Start with a small number of fish and gradually increase the population as the system matures. Acclimatize the fish by slowly adding water from the fish tank to the bag containing the fish over a period of 30-60 minutes. This helps them adjust to the water temperature and chemistry. Release the fish into the tank. Feed the fish a high-quality fish food daily. Monitor the fish for any signs of stress or disease.
Once the system is cycled, it's time to introduce your fish. Start with a small number of fish and gradually increase the population as the system matures. Acclimatize the fish by slowly adding water from the fish tank to the bag containing the fish over a period of 30-60 minutes. This helps them adjust to the water temperature and chemistry. Release the fish into the tank. Feed the fish a high-quality fish food daily. Monitor the fish for any signs of stress or disease.
Step 7: Plant Your Vegetables
Now you can plant your vegetable seedlings or seeds in the grow media. Choose plants that are suitable for aquaponics, such as leafy greens (lettuce, spinach, kale), herbs (basil, mint, cilantro), and strawberries. Ensure that the roots of the plants are in contact with the grow media so they can access the nutrients in the water. Provide adequate lighting for plant growth. If you are growing indoors, you may need to supplement with artificial grow lights.
Now you can plant your vegetable seedlings or seeds in the grow media. Choose plants that are suitable for aquaponics, such as leafy greens (lettuce, spinach, kale), herbs (basil, mint, cilantro), and strawberries. Ensure that the roots of the plants are in contact with the grow media so they can access the nutrients in the water. Provide adequate lighting for plant growth. If you are growing indoors, you may need to supplement with artificial grow lights.
Step 8: Monitor and Maintain
Regularly monitor the water parameters (pH, ammonia, nitrite, nitrate) and adjust them as needed. The ideal pH range for aquaponics is between 6.0 and 7.0. Change the water in the fish tank partially (25-50%) every few weeks to remove excess nutrients and maintain water quality. Clean the grow bed periodically to remove any accumulated debris. Harvest your vegetables as they mature.
Regularly monitor the water parameters (pH, ammonia, nitrite, nitrate) and adjust them as needed. The ideal pH range for aquaponics is between 6.0 and 7.0. Change the water in the fish tank partially (25-50%) every few weeks to remove excess nutrients and maintain water quality. Clean the grow bed periodically to remove any accumulated debris. Harvest your vegetables as they mature.
Conclusion
Congratulations! You've successfully built your own aquaponics box. With proper care and maintenance, you can enjoy a continuous supply of fresh vegetables and healthy fish. Aquaponics is a sustainable and rewarding way to grow food, and your homemade system is a testament to your ingenuity. Enjoy the fruits (and vegetables!) of your labor!
Congratulations! You've successfully built your own aquaponics box. With proper care and maintenance, you can enjoy a continuous supply of fresh vegetables and healthy fish. Aquaponics is a sustainable and rewarding way to grow food, and your homemade system is a testament to your ingenuity. Enjoy the fruits (and vegetables!) of your labor!
Residential Aquaponics System At Roger Krug Blog
storage.googleapis.com What Are Aquaponics?
www.greenlife.co.ke Component Of Aquaponics Systems
www.aquaponicsforbeginners.com

0 komentar:
Posting Komentar